
Ja es ist mühselig all den vielen verschiedenen Feldtypen dieselben Farben und Fonts zuzuweisen, oder dasselbe Skript in mehrere Objekte zu kopieren. Fragmente oder eigene Objekte in der Bibliothek vereinfachen das zwar, haben aber zwei Nachteile. Zum einem ist das nachträgliche Ändern einer Eigenschaft genauso aufwendig, als wenn man jedes Objekt einzeln editiert und dann führen einzeln angepasste Objekte immer zu einer größeren Datei.
Für solche Zwecke bieten sich daher Prototypen an. Hier braucht man nur die Eigenschaften des Prototypen ändern und alle anderen Objekte erben diese Änderungen automatisch. So lassen sich z.B. Schriftarten, Farben, Ränder oder Skripte global anpassen. Ein weiterer Vorteil ist, dass die referenzierenden Objekte kaum Platz in der XML-Struktur benötigen, was die Dateigröße gering hält. Das macht sich vor allem bei Formularen mit hunderten Objekten bezahlt.
Klingt toll oder? Noch nie von gehört, was?! Nun ja, Prototypen existieren eigentlich schon immer in XFA, nur wirklich publik hat Adobe das nie gemacht.
Tatsächlich sind sie eingehend in der XFA Spezifikation beschrieben, aber wer liest schon ein 1.500 Seiten starkes Handbuch so genau durch?
Prinzipiell ist es ganz einfach mit den Prototypen.
Jedem Objekt, egal ob Teilformular, Feld, Border oder Skript, kann man ein id-Attribut (auch bekannt als XML ID) zuweisen, das es innerhalb des Formularentwurfs eindeutig identifiziert. Es wird dadurch zu einen Prototypen.
Ein anderes Objekt kann dann auf dieses id-Attribut referenzieren und erbt so alle Eigenschaften und Kind-Objekte des Prototypen.
Dafür fügt man dem Objekt ein use oder usehref-Attribut hinzu. Das use-Attribut kann dabei nur auf Prototypen innerhalb des Formularentwurfs zugreifen, das usehref-Attribut hingegen auch auf externe Formularentwürfe (*.xdp). Letzteres ist aber nur bei Serverlösungen interessant.

It’s indeed a pain to assign all those different field types the same colors and fonts or to reuse the same script in different objects. Fragments and custom objects in a library already make such things easier but also have two disadvantages. Firstly it’s as complicated to change a property afterwards as when you edit each object separately and secondly the file sizes grows with every single edited object.
For those purposes prototypes are the best solution. There you only need to edit the properties of a prototype and all referencing objects automatically get the changes assigned. So you can edit fonts, colors, border or scripts very easy globally. A benefit of this method is, that the referencing objects need hardly any space in the XML source, which means a smaller file size. This is especially handy in forms with hundres of fields.
Sounds great, right?! Ok, you’ve never heard about before, didn’t you? Well, prototypes exists since ages in XFA, but never have been made such public by Adobe.
You can read about them in the XFA specs, but who’s ever reading a 1.500 pages strong manual completely?
Ok, the usage of prototypes is indeed easy.
Every object – no matter if it’s a subform, field, border or script – can have assigned an id attribute (also known as XML ID), which identifies these object within the template. By this id attribute the object becomes a prototype.
Another object then can reference to this id attribute and will inherit all properties and child objects of the prototype.
Therefore you add an use or usehref attribute to the object. The use attribute can only refer to prototypes within the current template while the usehref attribute can also refer to external templates (*.xdp). The second method is only interesing in server enviroments.
Einen Prototypen erstellen
//
Creating a prototype
Schritt 1 – Erstellen Sie ein neues Formular und platzieren Sie dort ein Textfeld.
//
Step 1 – Create a new form and place a text field somewhere.

Schritt 2 – Editieren Sie das Textfeld – ändern Sie Schriftart, Beschriftung, Hintergrundfarbe usw.
//
Step 2 – Edit the text field – change the font, caption, background color etc.

Schritt 3 – (optional) Ziehen Sie das Textfeld in der Hierarchie in den Ast "referenzierte Objekte".
//
Step 3 – (optional) Drag the text field into "referenced objects" within the hierarchy tree.

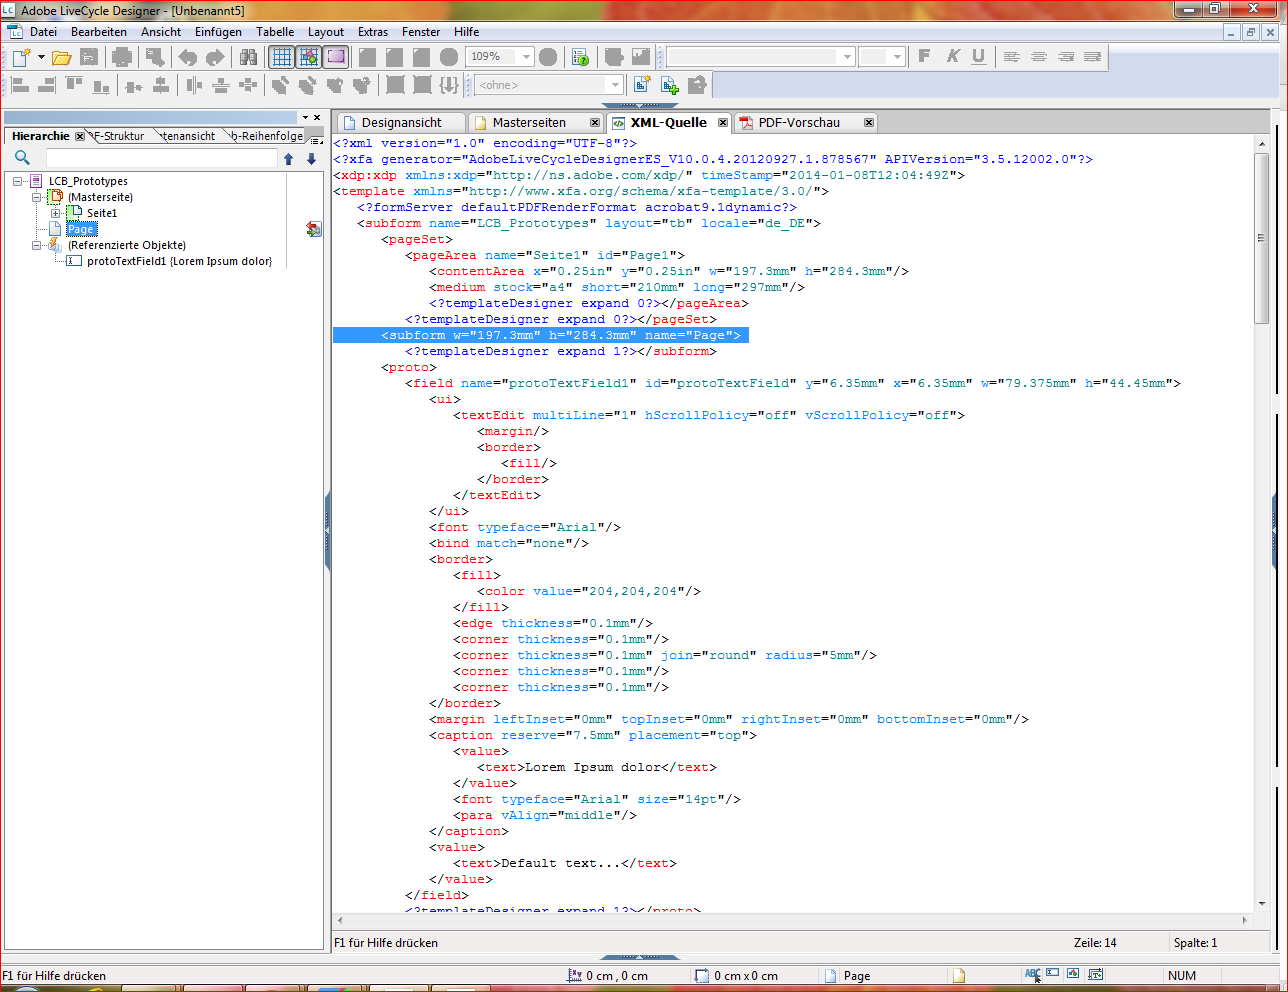
Schritt 4 – Wechseln Sie in die XML-Quelle und klicken Sie dann auf das Textfeld in der Hierarchie, damit die Ansicht direkt zu dem Feld springt.
//
Step 4 – Switch to the XML source view and click on the text field in the hierarchy so the focus is set onto the field.
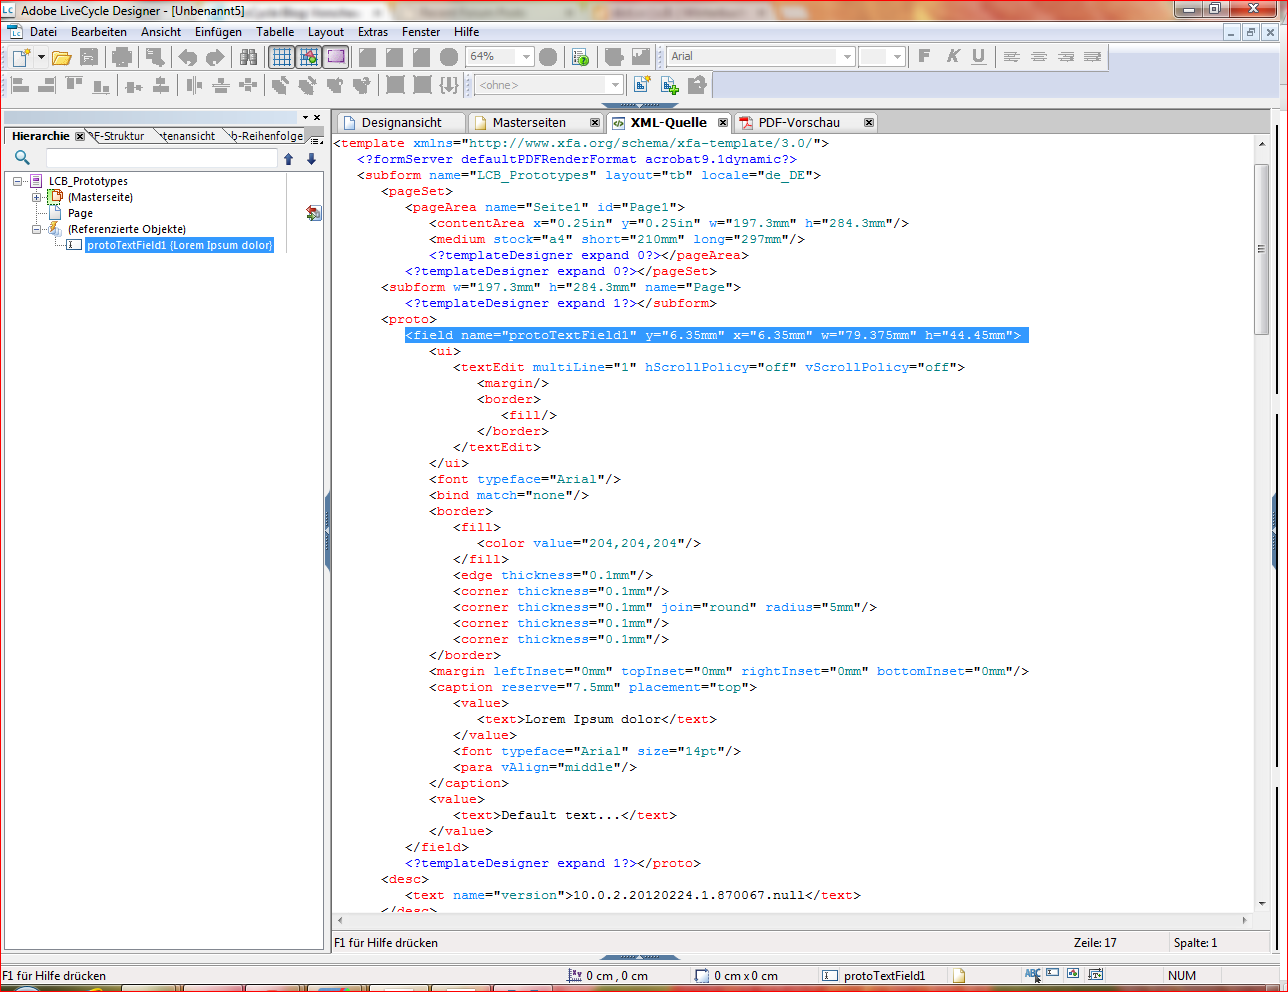
Schritt 5 – Fügen Sie dem <field>-Tag ein id-Element hinzu, z.B. id="protoTextField".
//
Step 5 – Add an id element to the <field>-Tag like id="protoTextField".
<!-- Feld mit XML ID // Field with XML ID -->
<field name="protoTextField1" id="protoTextField" y="6.35mm" x="6.35mm" w="79.375mm" h="44.45mm">
   ...
</field>

Einen Prototypen referenzieren
//
Referencing a prototype
Dem referenzierenden Objekt fügt man ein use-Attribute hinzu, dass einen Stringwert mit der Referenz zum Prototypen enthält.
Die einfachste ist die Verwendung der XML ID des Prototypen.
Der Stringwert beginnt mit hier mit einer # gefolgt von der XML-ID des Prototypen, also z.B. use="#prototypeId".
Die andere Möglichkeit ist der SOM-Ausdruck des Prototypen, also z.B. use="Form1.#proto[0].protoTextField".
Diese Methode ist nicht so flexibel, wie die mit der XML-ID, da man alle Referenzen manuell ändern muss, wenn sich der SOM-Ausdruck des Prototypen geändert hat.
You add a use attribute to the referencing object, that has a string value with the prototypes reference.
The simplest method is the usage of the prototypes XML ID.
Therefore the string begins with a # followed by the XML ID, such as use="#prototypeId".
Another method is a SOM expression of the prototype, like use="Form1.#proto[0].protoTextField".
This one isn't that flexible as the one with the XML ID, because you have to correct each reference manually when the SOM expression of the prototype has changed.
Schritt 1 – Wechseln Sie in die XML-Quelle und platzieren Sie den Textcursor an der Stelle, wo ein neues referenzierendes Feld erstellt werden soll.
//
Step 1 – Switch to XML source view and place the text cursor where you want to add a new referencing field.
Schritt 2 – Geben Sie ein <field>-Tag mit dem use-Attribute in die XML-Quelle ein.
//
Step 2 – Add a <field>-Tag with the use-Attribute into the XML source.
<!-- Feld mit Prototyp-Referenz // Field with prototype reference -->
<field use="#protoTextField/>

Schritt 3 – Öffnen Sie die Design-Ansicht oder PDF-Vorschau, um das Ergebnis zu sehen.
//
Step 3 – Open the the Design view or PDF preview to check the results.


Hinweise
//
Hints
Die Änderungen an Prototypen sehen Sie nicht sofort bei den referenzierenden Objekten, da Designer das Template nicht neu läd.
Wechsel Sie daher in die XML-Quelle oder PDF-Vorschau oder ändern Sie mit Strg + Mausrad einfach die Zoomstufe, um ein Neuladen zu erzwingen.
Wenn Sie Eigenschaften eines referenzierenden Objekts ändern, werden für dieses Objekt die Änderungen in das Template übernommen und die des Prototypen ignoriert.
So können Sie z.B. die Schriftart des Prototypen übernehmen aber eine andere Schriftgröße und Farbe definieren.
You wouldn't see you changes immediately at the referening objects as Designer doesn't reload the template.
To force the template reload you can either switch to the XML Source or PDF Preview or you just change the zoom settings with Ctrl + mousewheel.
If you change any property of an referencing object those changes will be saved in the template and the identical properties of the prototype are ignored.
So you can for example use the font of a prototype while using a separate setting for font size and color.
Beispiel-Formular
//
Sample form
https://files.acrobat.com/preview/6dc8d4f7-b7db-4e1b-af51-74230dc969b1
Keine Kommentare:
Kommentar veröffentlichen